
Introduction
Angular 17 is a powerful tool for creating modern web applications. With each new release, the development team adds new features, and one of the most exciting additions in Angular 17 is the support for Signal. In this article, we will explore what Signal is, how to use it in Angular, and provide real-world usage examples.
What is Signal?
Signal is a concept used to track and respond to data changes. It simplifies state management and allows components to automatically update when data changes. In the context of Angular, Signal integrates with reactive and asynchronous processes, providing a simpler and more intuitive way to manage application state.
Why is Signal Important?
- Reactivity: Signal allows automatic reactions to data changes, simplifying the synchronization of application state and user interface.
- Performance: Using Signal can improve performance by optimizing component rendering.
- Simplicity: Signal simplifies code, making it more readable and maintainable.
Creating a Signal
To start, let’s create a simple Signal that will track the state of a counter. In Angular, we can create a Signal using the signal from the @angular/core library.
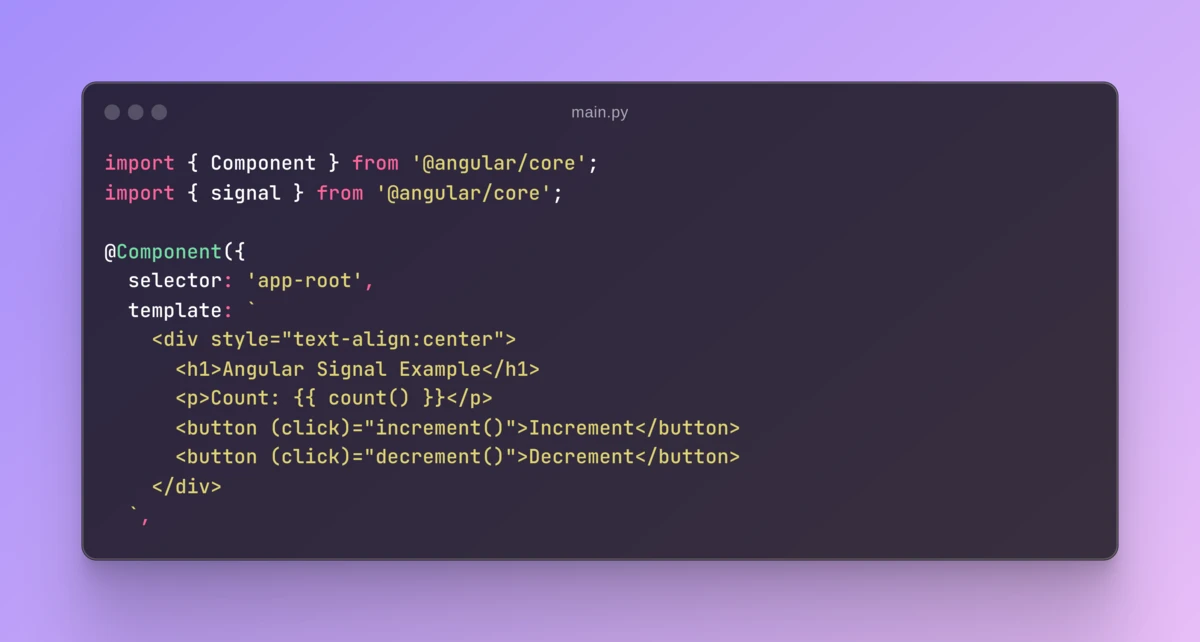
Step 1: Import Required Modules
Open the file and import the necessary modules, then create a Signal for the counter:
import { Component } from '@angular/core';
import { signal } from '@angular/core';

@Component({
  selector: 'app-root',
  template: `
    <div style="text-align:center">
      <h1>Angular Signal Example</h1>
      <p>Count: {{ count() }}</p>
      <button (click)="increment()">Increment</button>
      <button (click)="decrement()">Decrement</button>
    </div>
  `,
  styleUrls: ['./app.component.css']
})
export class AppComponent {
  count = signal(0);

  increment() {
    this.count.set(this.count() + 1);
  }

  decrement() {
    this.count.set(this.count() - 1);
  }
}
Signal Methods
- set: The
setmethod is used to set a new value for the signal. In the example above, theincrementmethod increases the signal’s value by 1 usingthis.count.set(this.count() + 1). - update: The
updatemethod allows updating the signal’s value based on its current value:this.count.update(value => value + 1); - subscribe: The
subscribemethod allows subscribing to signal changes:this.count.subscribe(value => { console.log('Count changed to', value); });
Accessing the Signal
To access the signal’s value, you need to call it as a function: count(). This is necessary because Signal returns a function that wraps the current value, allowing Angular to track changes and automatically update corresponding components.
Reactive Signals
One of the key advantages of Signal is the ability to create reactive signals that automatically update when dependencies change. Let’s consider an example where we have two signals representing the coordinates of a point and a third signal that calculates the distance from the origin.
Step 1: Create Coordinate Signals
import { Component } from '@angular/core';
import { signal, computed } from '@angular/core';

@Component({
  selector: 'app-root',
  template: `
    <div style="text-align:center">
      <h1>Reactive Signal Example</h1>
      <p>X: {{ x() }}, Y: {{ y() }}</p>
      <p>Distance from origin: {{ distance() }}</p>
      <button (click)="moveRight()">Move Right</button>
      <button (click)="moveUp()">Move Up</button>
    </div>
  `,
  styleUrls: ['./app.component.css']
})
export class AppComponent {
  x = signal(0);
  y = signal(0);

  distance = computed(() => Math.sqrt(this.x() ** 2 + this.y() ** 2));

  moveRight() {
    this.x.set(this.x() + 1);
  }

  moveUp() {
    this.y.set(this.y() + 1);
  }
}
What is computed?
computed is a function that allows creating reactive computations based on other signals. The value returned by computed will automatically update when any of the signals it references change. In the example above, distance is computed based on x and y and will update whenever either of these signals change.
Asynchronous Operations with Signal
Signal can also be used to manage state when performing asynchronous operations, such as fetching data from an API.
Step 1: Create Signal and Methods for Storing Data and Loading State
data = signal(null);
loading = signal(false);
error = signal(null);

loadData() {
  this.loading.set(true);
  this.error.set(null);

  fetch('https://api.example.com/data')
    .then(response => response.json())
    .then(data => {
      this.data.set(data);
      this.loading.set(false);
    })
    .catch(error => {
      this.error.set(error);
      this.loading.set(false);
    });
}
Step 2: Update the Template
import { Component } from '@angular/core';
import { signal } from '@angular/core';

@Component({
  selector: 'app-root',
  template: `
    <div style="text-align:center">
      <h1>Async Signal Example</h1>
      <div *ngIf="loading()">Loading...</div>
      <div *ngIf="error()">Error: {{ error() }}</div>
      <div *ngIf="data()">
        <pre>{{ data() | json }}</pre>
      </div>
      <button (click)="loadData()">Load Data</button>
    </div>
  `,
  styleUrls: ['./app.component.css']
})
export class AppComponent {
  data = signal(null);
  loading = signal(false);
  error = signal(null);

  loadData() {
    this.loading.set(true);
    this.error.set(null);

    fetch('https://api.example.com/data')
      .then(response => response.json())
      .then(data => {
        this.data.set(data);
        this.loading.set(false);
      })
      .catch(error => {
        this.error.set(error);
        this.loading.set(false);
      });
  }
}
Comparing Signal and RxJS
RxJS has been the primary tool for managing reactivity in Angular until the introduction of Signal. Let’s compare them:
Signal
- Ease of Use: Signal provides a simpler and more intuitive syntax for state management.
- Performance: Signal is optimized for updating only the parts of the DOM that have actually changed.
- Integration: Signal integrates better with Angular’s change detection mechanisms.
RxJS
- Flexibility: RxJS offers powerful operators for complex reactive chains.
- Broad Support: RxJS is used in many projects and has a large ecosystem.
- Learning Curve: RxJS requires a deeper understanding of reactive programming, which can be challenging for beginners.
Example Comparison
Signal:
count = signal(0);

increment() {
  this.count.set(this.count() + 1);
}
RxJS:
import { BehaviorSubject } from 'rxjs';

count$ = new BehaviorSubject(0);

increment() {
  this.count$.next(this.count$.value + 1);
}
Advantages and Disadvantages of Using Signal
Advantages
- Performance: Optimizes DOM updates by tracking changes at the Signal level.
- Simplicity: More straightforward and understandable syntax compared to RxJS.
- Integration with Angular: Better integration with Angular’s change detection mechanisms.
Disadvantages
- Limited Flexibility: Signal is less flexible compared to RxJS, especially for complex reactive scenarios.
- Smaller Ecosystem: Signal is newer and has a smaller ecosystem compared to RxJS.
- Learning Curve: Transitioning from RxJS to Signal requires learning new concepts and approaches.
Conclusion
Signal in Angular 17 provides a powerful and easy-to-use mechanism for managing state and reactivity in applications. In this article, we explored the basic concepts and usage examples of Signal, including basic signals, reactive signals, and asynchronous operations. We also compared Signal with RxJS and discussed their advantages and disadvantages.
Try using Signal in your next Angular project and experience the benefits of this powerful tool.
In case you have found a mistake in the text, please send a message to the author by selecting the mistake and pressing Ctrl-Enter.