When you want to give your WordPress website a unique flair, CSS is the best tool. Many themes and page builders (like WordPress’s Site Editor or the Divi Theme) handle most styling for you. However, there are still instances where you need to write your own custom CSS. This article covers a handful of ways to do that safely—both using WordPress’s default tools and via enhanced solutions like Divi.
TL;DR
Add custom CSS to WordPress using the Customizer under “Appearance > Customize > Additional CSS” or install a plugin like WPCode. The Customizer is the easiest method for most things. Divi gives you great ways to do it, too.
What is CSS and Why Use it in WordPress?
CSS (Cascading Style Sheets) defines how your site looks—fonts, colors, layouts, and more. Typically, your theme or page builder offers many style settings. But adding custom CSS can be advantageous when:
- You need a tweak that isn’t part of the theme’s default design controls.
- You want a unique style for a few specialized elements.
- You have advanced or large-scale styling demands.
- You want to use a CSS framework across your WordPress website.
Regardless of your theme or builder, you don’t need to edit your theme’s core files. Below are four reliable ways to add custom CSS without risking your site’s stability (and losing changes during updates).
Best Methods to Add Custom CSS in WordPress
Adding custom CSS might sound intimidating, but you don’t need to edit your theme’s core files. Instead, use one of these methods to safely add custom styles to your WordPress website. We’ll start with the most convenient options through Divi’s options but also show you other ways of doing it.
1. The WordPress Site Editor / Customizer (Default Approach)
For block themes (e.g., Twenty Twenty-Five), WordPress provides what they are calling the Site Editor. For classic themes, you still have the Customizer. Both offer a dedicated place to add your own CSS, here’s where you go to add yours:
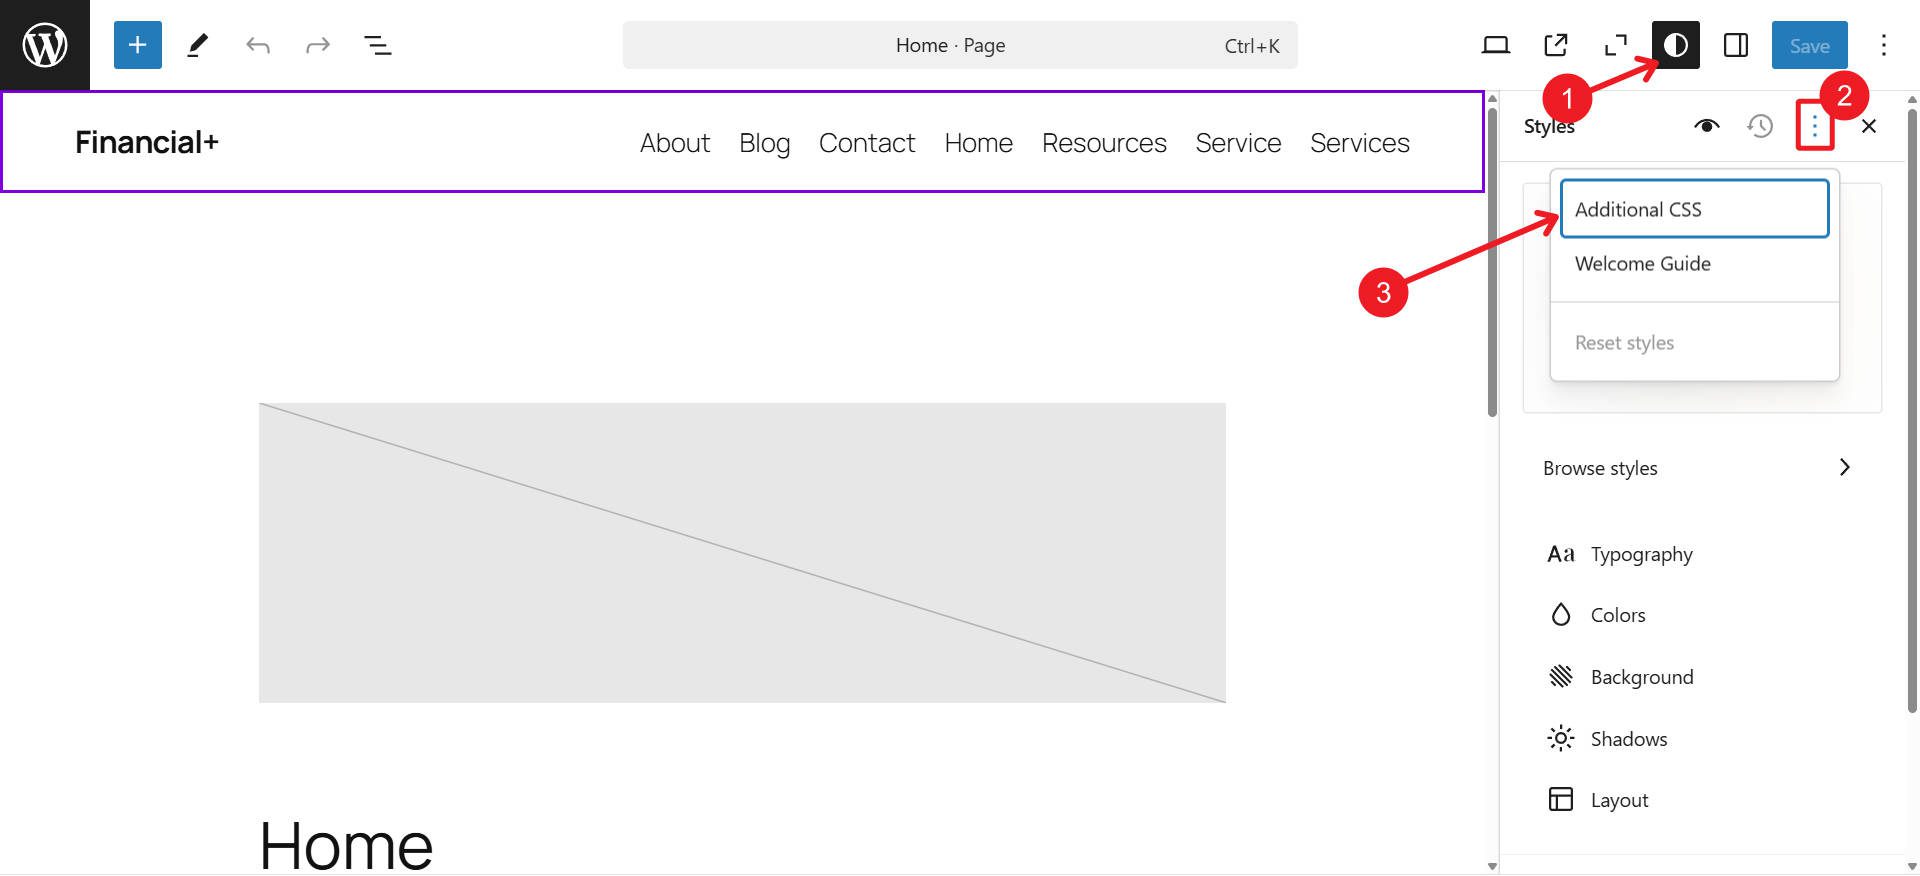
- Block Themes (Site Editor)
- From your WordPress Dashboard, go to Appearance > Editor.
- Open the “Styles” panel and look for the option to add “Additional CSS.”
- Paste your custom CSS and save.
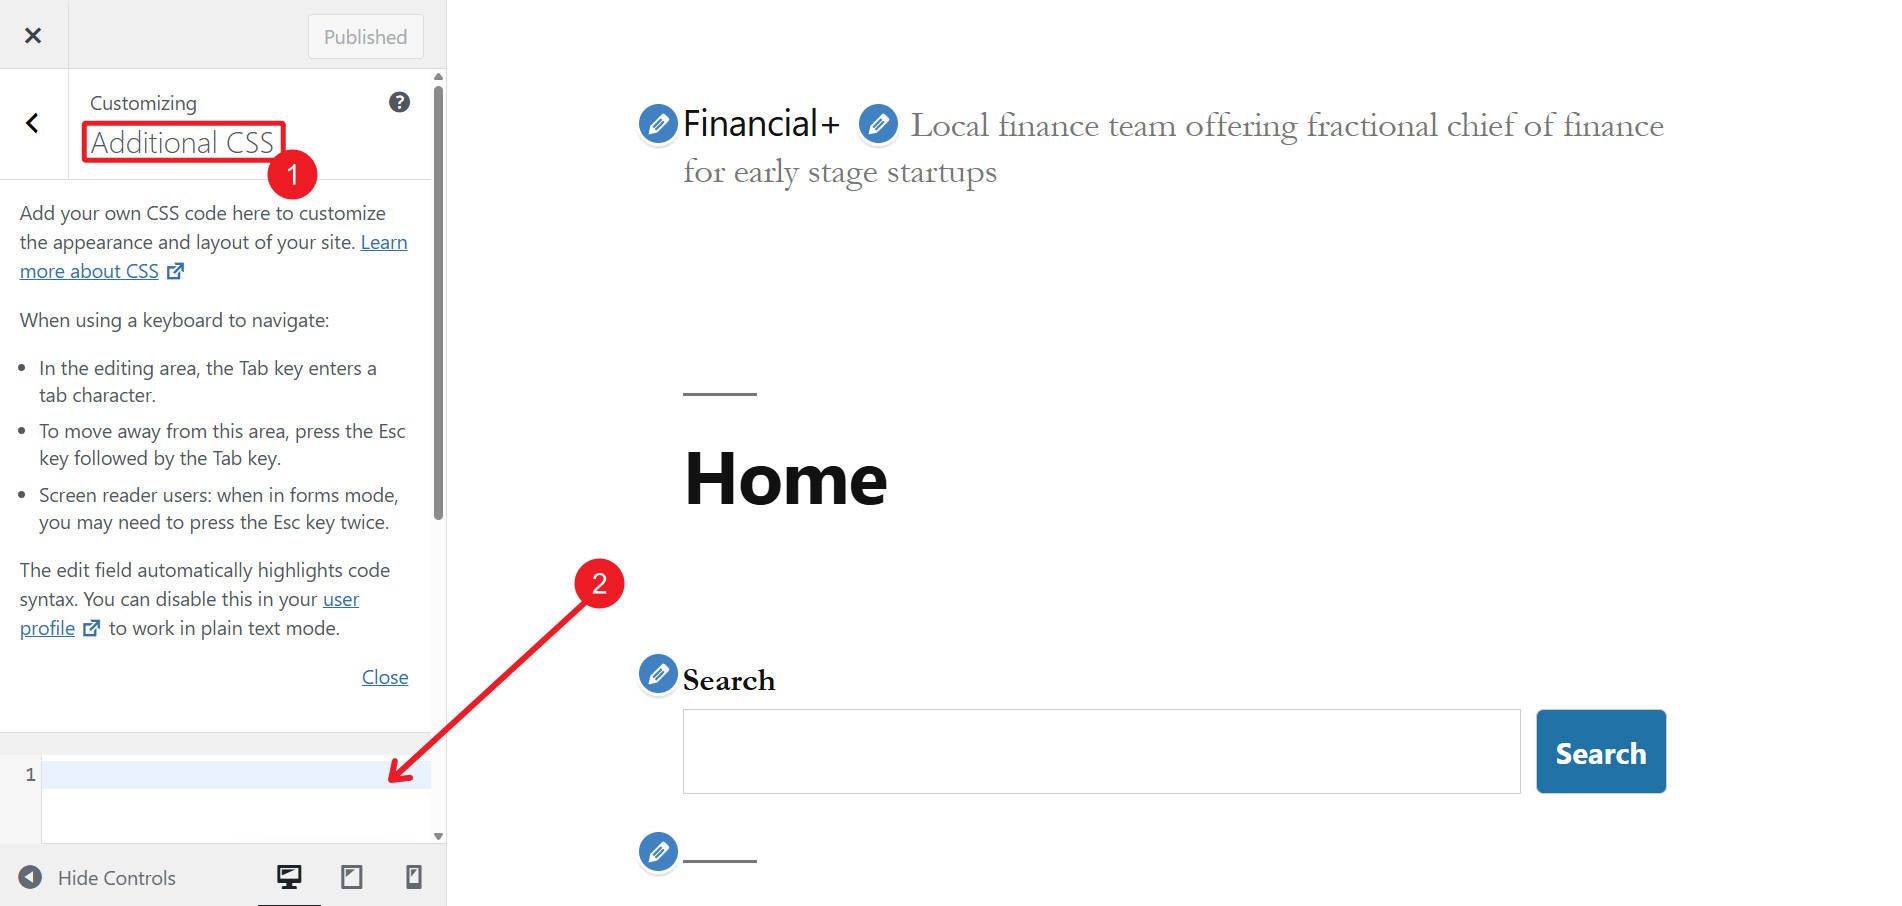
- Classic Themes (Customizer)
- Go to Appearance > Customize.
- Look for Additional CSS.
- Add your styles there and publish.
Using the default Site Editor or Customizer is an easy, site-wide method. Because your custom CSS is saved in your database, WordPress updates won’t overwrite it. You also don’t have to set up a child theme for basic CSS changes.
2. Code Deployment Plugins
If you prefer a centralized dashboard for custom code (including CSS, JavaScript, PHP snippets, etc.), plugins like WPCode or FluentSnippets are excellent. The downside to these is that you can only see how your CSS looks on the front end of your site (whereas with Divi, the Theme Customizer, and WPs Site Editor, CSS changes can be seen on the backend where you place it).
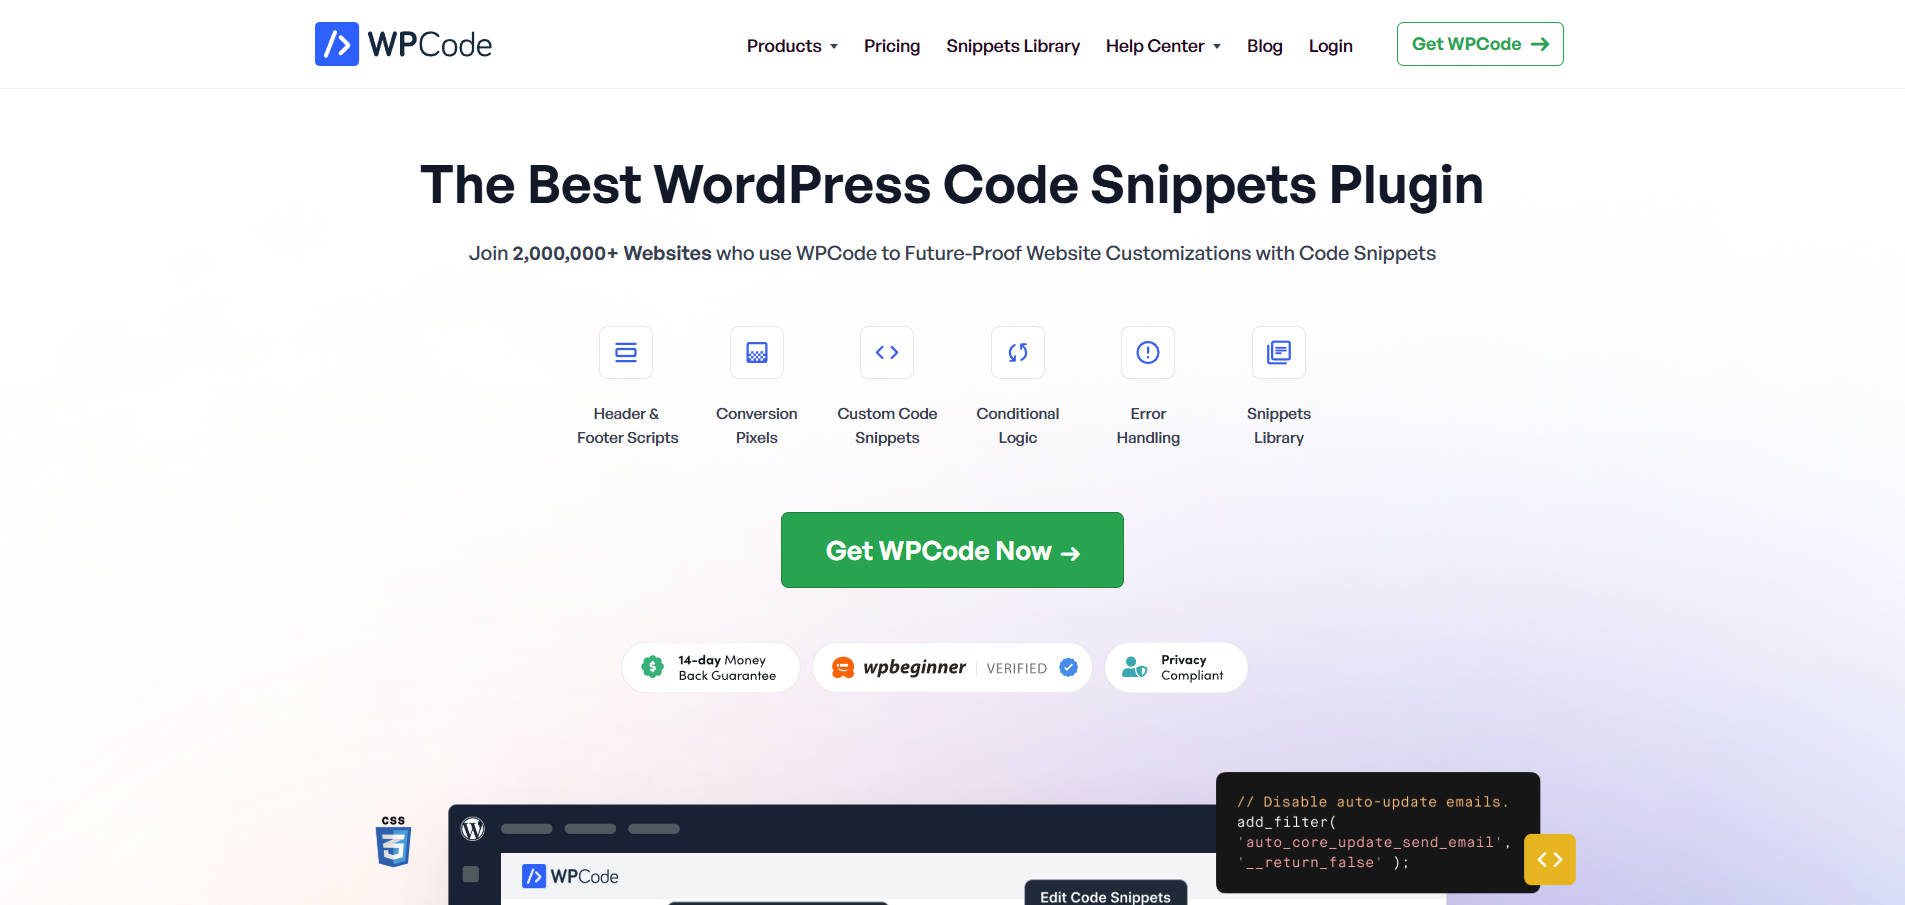
Install and activate your plugin of choice—WPCode has been around for a long time and is reliable.
Navigate to your plugin’s dashboard and create a new snippet. Add your custom CSS, give it a descriptive name, and choose its deployment rules (e.g., only site-wide or just on certain pages). Finally, save your snippet.
These types of plugins store your CSS in one place and protect your changes from theme or WordPress updates. They’re especially helpful if you work with custom JavaScript or PHP.
Get WPCode
3. Child Theme (Advanced)
When you want extensive modifications or prefer to organize your CSS in separate files, a child theme is the recommended approach. It prevents your changes from vanishing with routine theme updates. This is because if you edit a theme file, and that theme updates, the update will replace your edited file with the newest version from the developers.

To use this method, you will need to create a child theme. You can do this via a plugin or by manually adding a folder (e.g., mytheme-child) inside wp-content/themes/custom-child-theme/stylesheet.css.
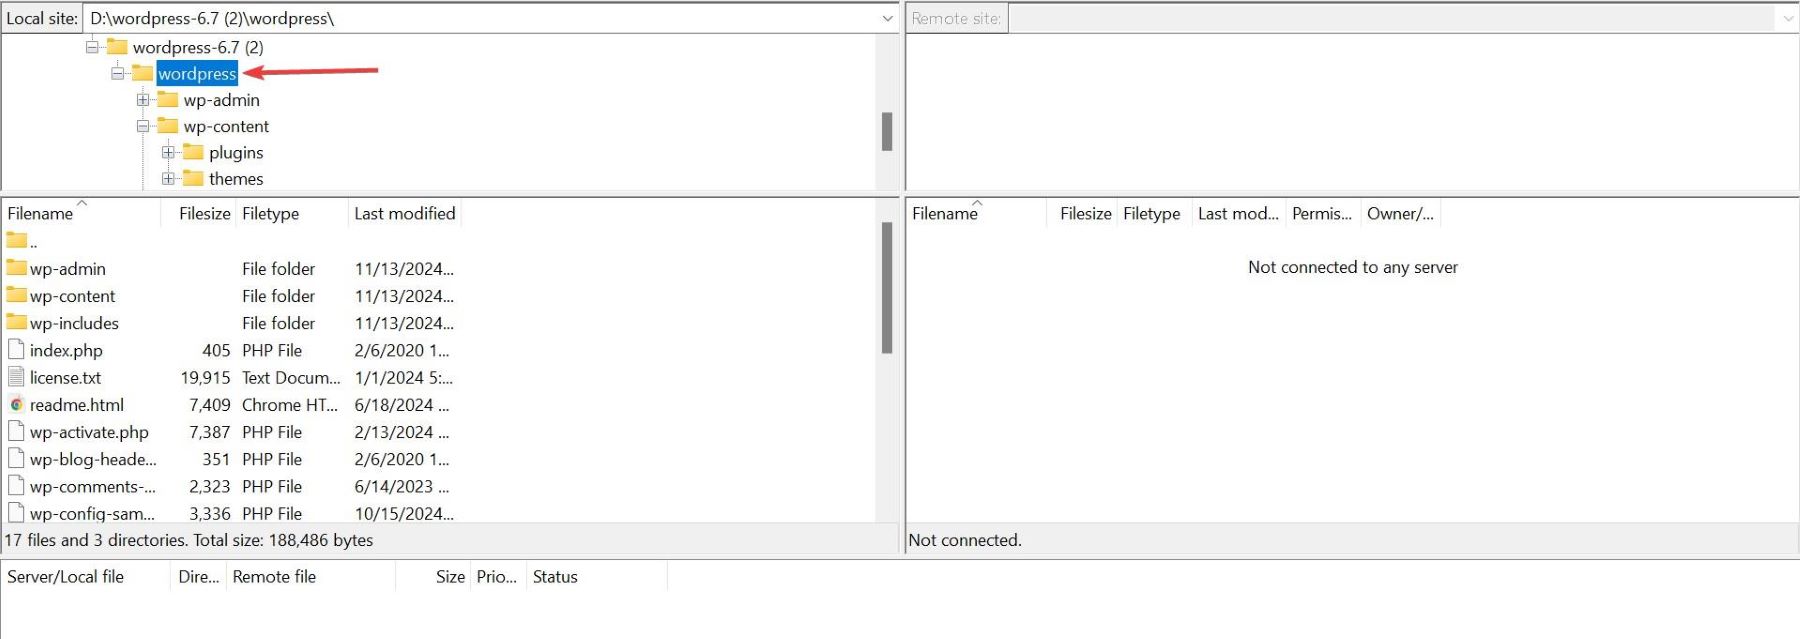
Inside that folder, create a stylesheet.css referencing your parent theme. Many Child Theme users optionally add a functions.php file if they need to add custom PHP to their site that will not get overridden. Lastly, you need to activate it in your Dashboard. You can make any changes to your Child Theme via FTP or in the Files area.

There are a lot of pre-built Divi Child Themes that come with all sorts of predefined styles and extra functions. Of course, you can create your own as well.
Note: If you only plan minor CSS changes, using the Site Editor or a plugin is simpler. But a child theme is your friend if you have big modifications or want your own “style.css” file structure.
Learn About Child Themes
4. Multiple Ways Using Divi (Robust & Beginner-Friendly)
Finally, if you want a more visual (and less code-intensive) experience with the ability to add custom CSS still, Divi is your best bet. It blends advanced design controls—so you often won’t need additional CSS—plus flexible ways to integrate your own code.
Write Less CSS with Divi
Before I show you four quick ways of adding custom CSS with Divi (it really gives you everything you need), I wanted to show you how Divi reduces your dependency on writing CSS yourself. Firstly, the Editor handles so much for you. Every design setting in Divi automatically outputs dynamically loaded CSS for you.
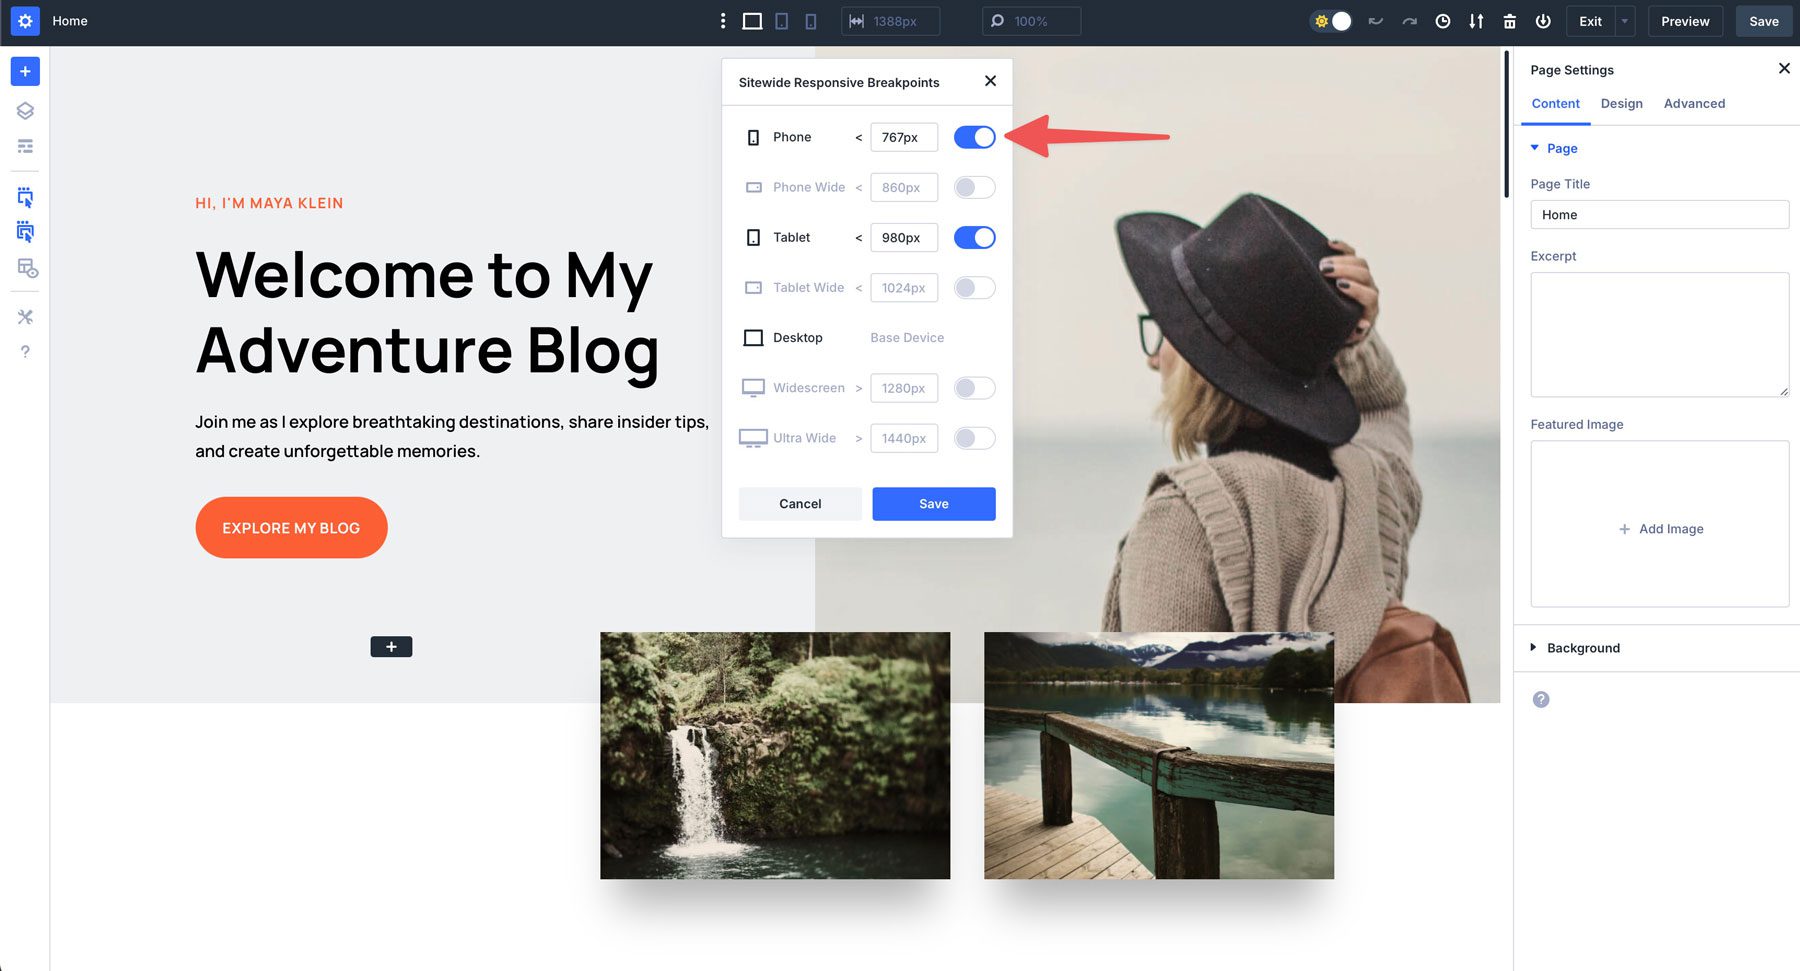
Example: Media Queries are often difficult for most to work with, but Divi handles the details for you
Divi 5 also supports all modern CSS units and functions (clamp(), calc(), and unitless values), bringing the power of advanced CSS units to a visual editor.
Divi AI can even write WordPress and Divi-compliant CSS for you.
For instances where you want to add your own custom CSS, Divi gives you four different contexts to do so (depending on your exact need).
Divi’s Theme Options for Sitewide CSS
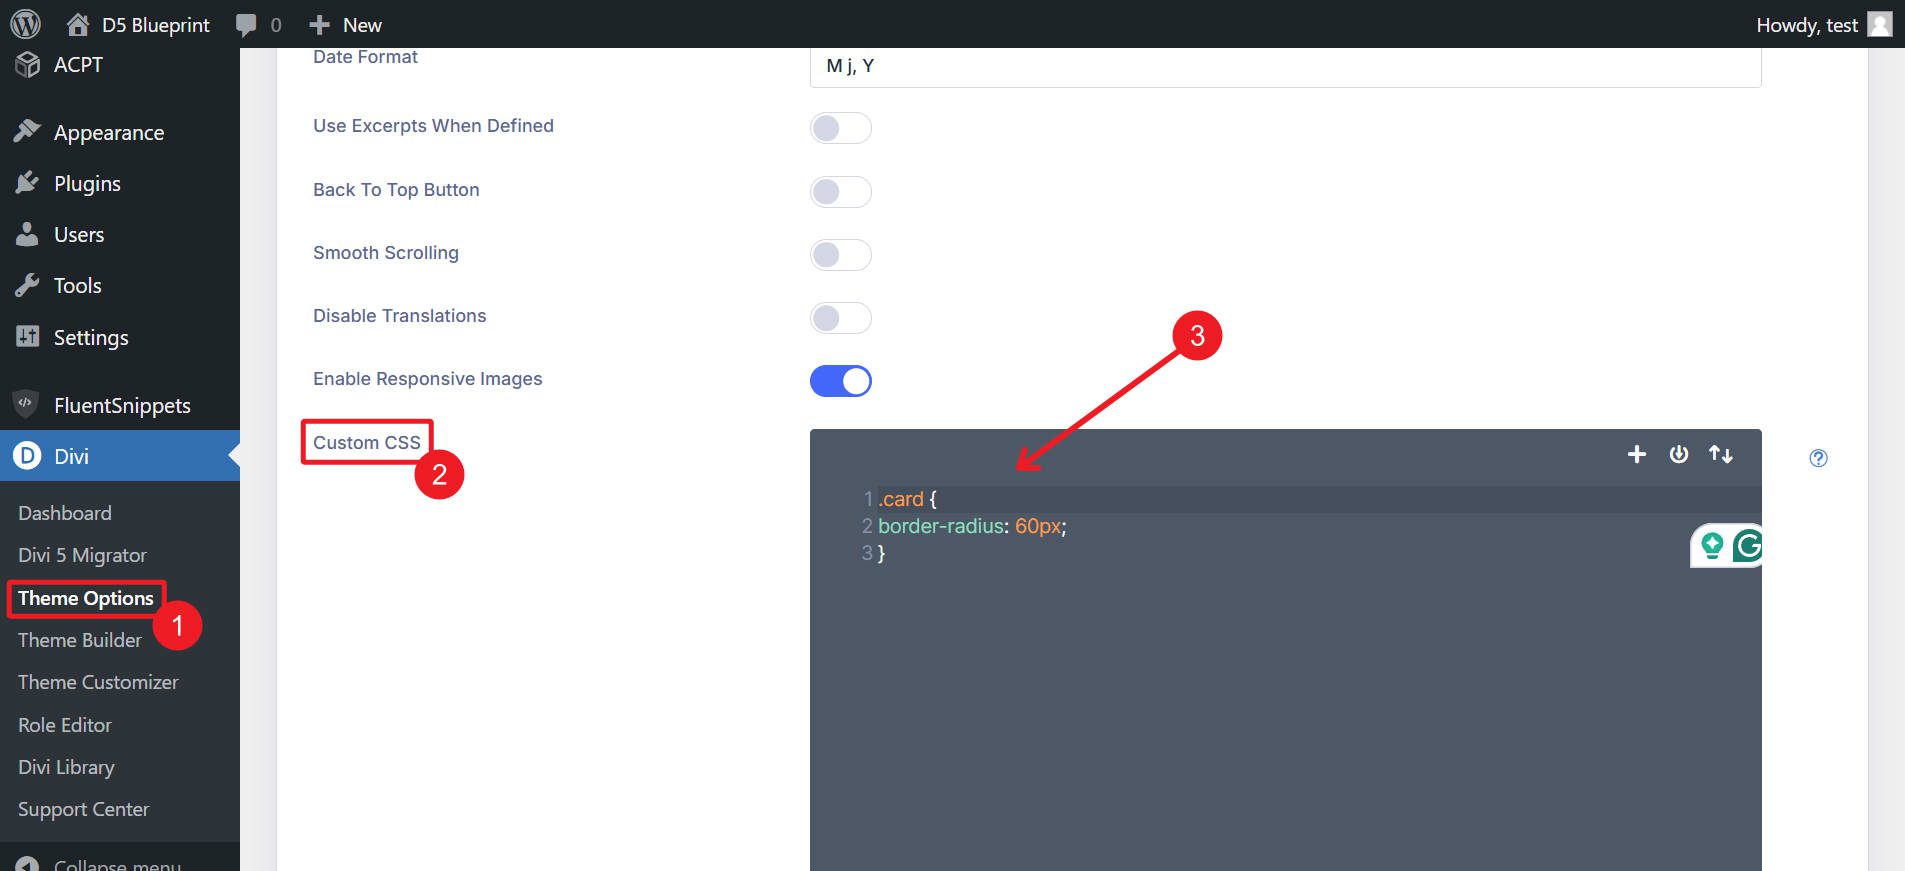
The first is adding sitewide styles through Divi’s Theme Options panel. Go to WordPress Dashboard > Divi > Theme Options and add site-wide CSS in the Custom CSS box.
Adding Page-Specific CSS with Divi
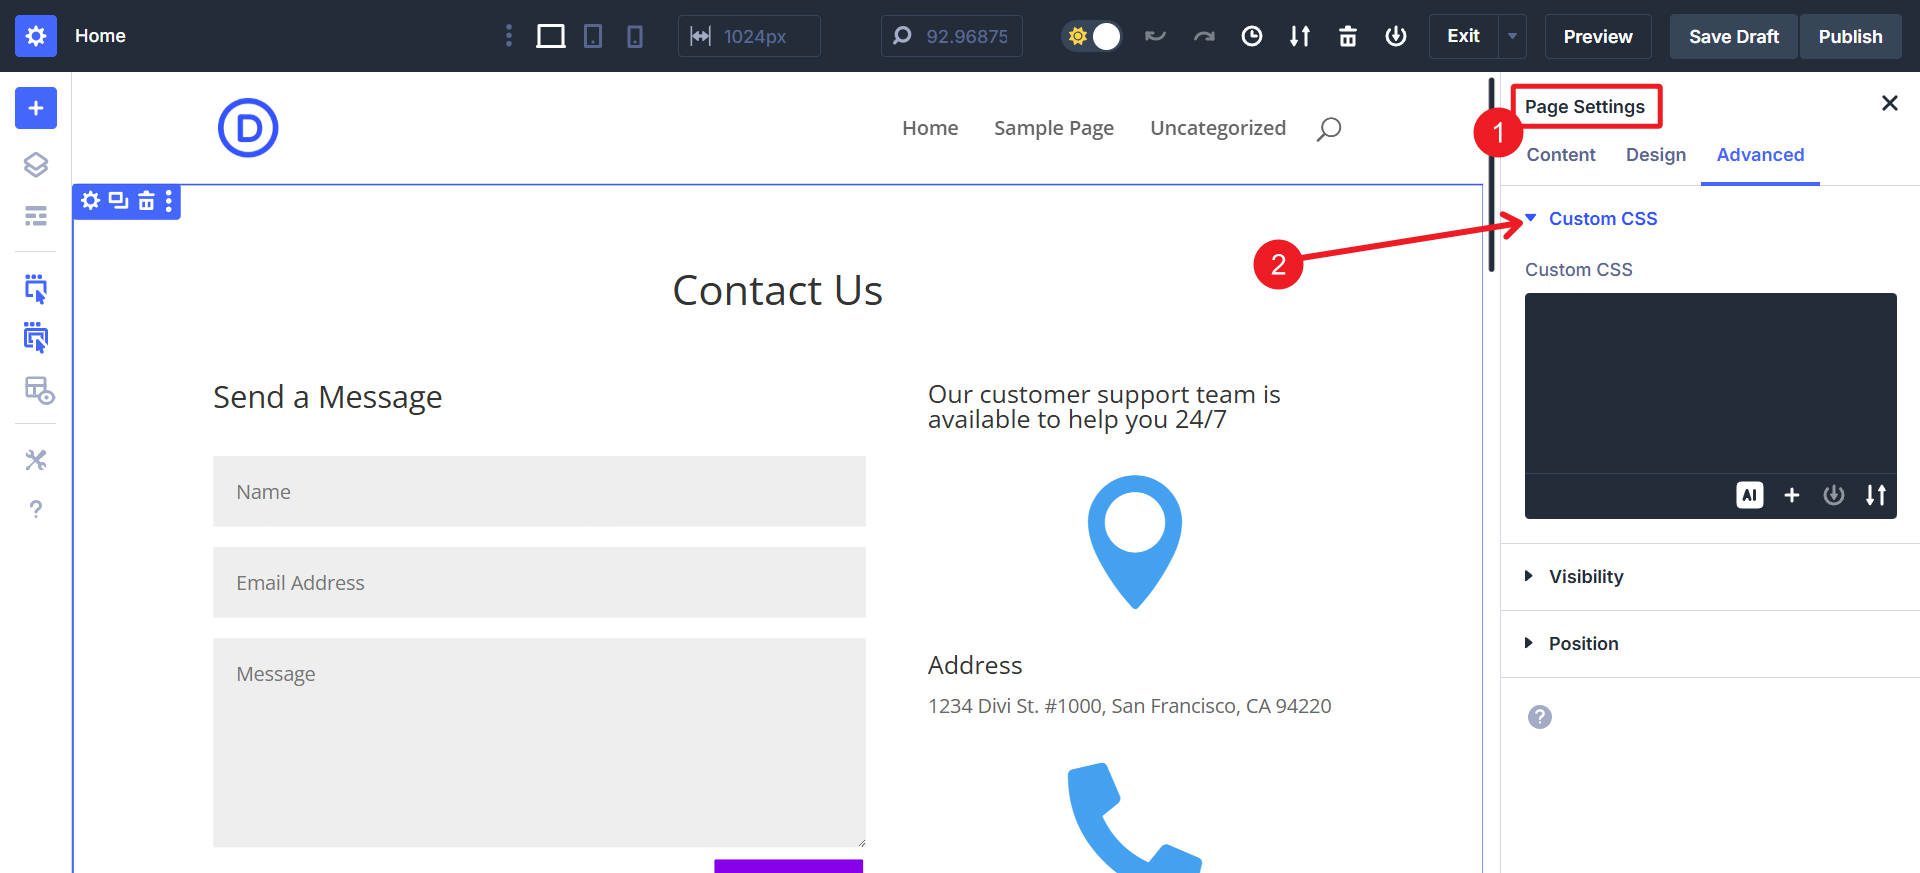
While editing a page in Divi, open Page Settings > Advanced Tab and place page-specific rules in the Custom CSS field.
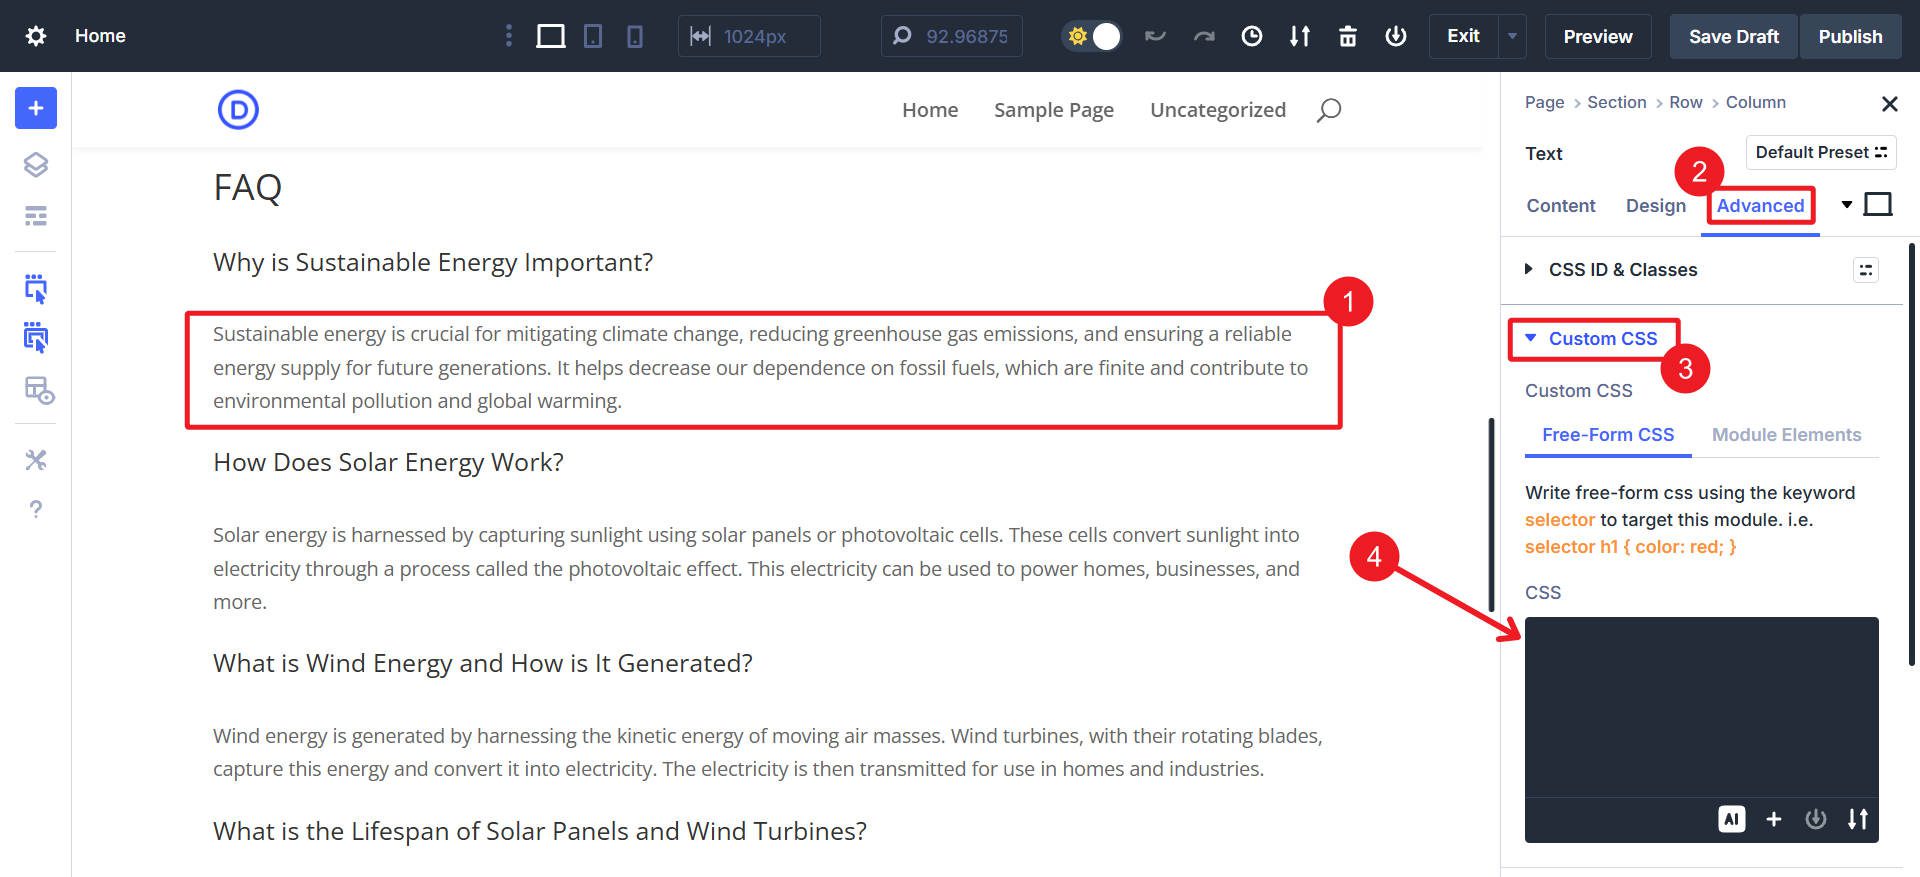
Adding Module-Level CSS
Every Divi module has an Advanced > Custom CSS tab, so you can style a single element without affecting the rest of your site. This is nice because you can directly “attach” your Custom CSS to the element it is styling.
You can also include Custom CSS in your Option Group Presets and Element Presets to dynamically apply the same styles whenever you want to summon them.
Adding Inline CSS via Code Module
Do you need fully custom HTML/CSS/JS? Divi’s Code Module supports inline code, perfect for self-contained custom elements.
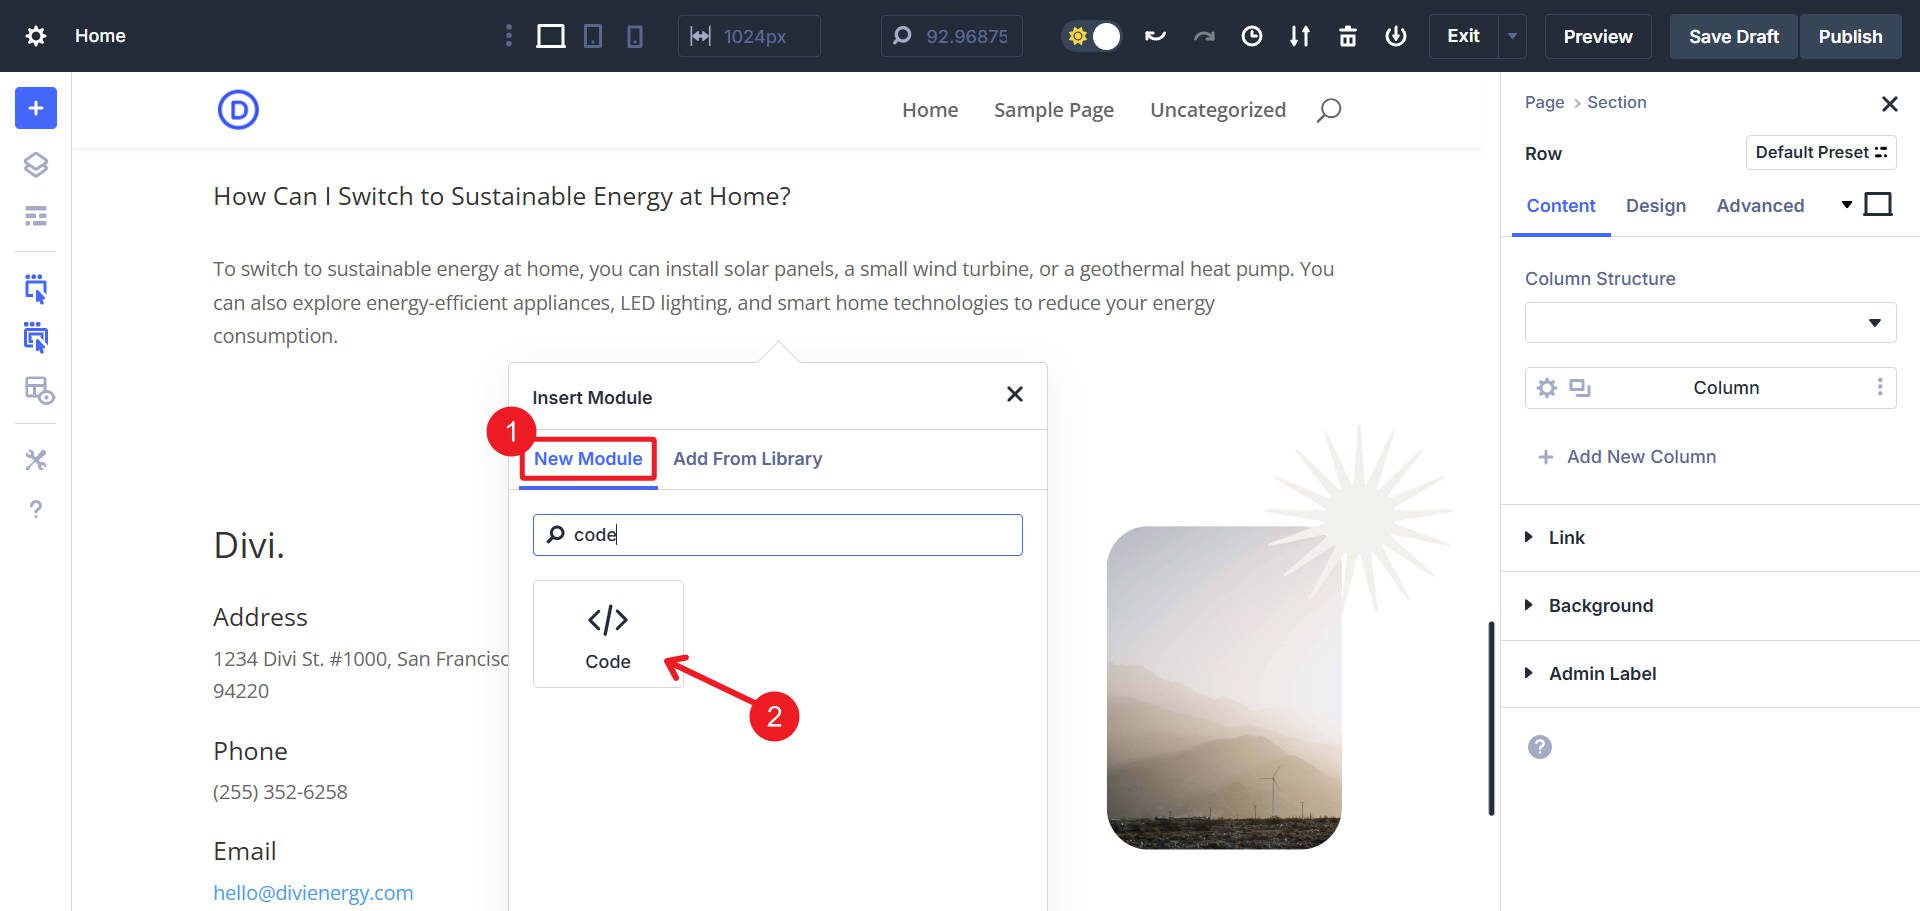
Simply add a Code Module in the Divi Builder, then insert your HTML/JS alongside inline CSS directly into the module’s code field.
CSS Best Practices with Divi and WordPress
You have a lot of options. As a design-first tool, Divi obviously pays special attention to designers’ needs and gives you multiple ways to add custom CSS to your website. Use the method that is easiest for you that matches the scope of your needs. To quickly see what might be best for you, take a look at this:
Most of these methods help you avoid editing core theme files directly and thus help you prevent updates from overwriting your changes. Consider a child theme for extensive customizations you might use from one website to another.
These allow responsive and dynamic styles directly in Divi’s built-in controls, significantly reducing the situations where custom CSS is necessary. I highly recommend you explore those with Option Group Presets to apply throughout your whole site quickly.
We’re building Divi to be the best WordPress Theme. It has so many design options built into its Visual Editor that you’ll find yourself writing less CSS. And even when you need it, it is always easy to add custom styles exactly how you need to.
Get Divi